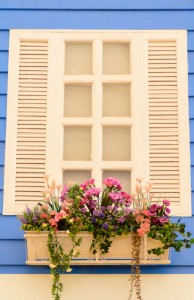
 With a little hard work and the right supplies, practically anyone can make an attractive window box. Follow these directions to make a window box you can be proud of. Then you’ll feel great filling it with the plants you love most.
Gather your materials
You’ll need wood that can withstand years of rain and snow. Redwood is a great option, but you’ll end up spending about $60 to build a couple of window boxes. To save money, choose medium-density overlay (MDO). A comparable amount of this plywood costs about $45.
Other materials you’ll need include:
Galvanized screws
Glue
Auto body filler
Primer
Paint
Brackets
Of course, you’ll also need a circular saw, straightedge, and a sander.
Getting started
First, you’ll need to decide what size you want your window box to be. Once you know, cut pieces of wood for the front, back, sides, and bottom.
It’s easiest to make rectangular window boxes. If you want to add some flare to yours, you’ll need to cut the sides at an angle so that the top is larger than the bottom.
Putting the window box together
Next, you need to put the window box together. Start by drilling pilot holes where you want to add screws. You should have at least three where the front meets the bottom. The sides should have at least two screws where they meet the bottom, front, and back.
Put down a streak of polyurethane glue where each of the pieces meet. This will hold them in place and create a watertight seal that will extend the window box’s life.
Now add and tighten the screws so that all of the pieces fit snugly.
Add some auto body filler to the screw holes. When they dry, you can sand them down to match the wood perfectly.
Finally, drill a few holes in the bottom for drainage.
Painting the window box
Whether you choose redwood or MDO, you’ll want to paint (or stain) the window box to make it more attractive and weather-resistant.
If you want to paint the box, apply a coat of primer and let it dry for at least 24 hours. Then paint the box whatever color you want.
If you want to stain the box, prepare to do it over several days. Each coat you put down should dry before you apply the next.
Attaching the window box to your house
Many people have vinyl siding that can make this step difficult. Since you don’t want to crack your vinyl siding, use scrap pieces of your wood to create a buffer between your brackets and your home. Set the scraps between the bracket and the vinyl before you drill pilot holes. Now you should be able to drill screws into the side of your home without cracking the vinyl.
Finally, put the window box on the bracket to make sure it’s steady. Screw the bottom of the box to the bracket. Fill the box with dirt and add your favorite plants.
Do you have other tips to make it easier for people to build attractive window boxes? Share your skills in the comments below.

